Windows 10 Overview - AndroTechHacks
Windows 10 - Overview
Windows 10 is the most recent version of the operating system from Microsoft. Officially it was released in 2015 and was initially offered free of charge to legitimate users of Windows 7 and Windows 8.1. This new version combines features from those two previous installments to suit the users in a better way for both desktop/laptop computers as well as mobile devices.

The most notable change in Windows 10 is that Microsoft replaced the Start screen tiles from Windows 8, and brought back the Start Menu. They also removed the vertical toolbars (or “charms”) that appeared from the sides of the screen. These changes make this Windows version easier to use for users of both desktop/laptops and mobile devices.
Windows 10 - Installation
There are two approaches you can take for installing Windows 10 in your computer: Upgrade or a Clean Install.
Typically, when you upgrade your operating system, all your documents and applications remain unchanged, whereas with a clean install you would be starting again from scratch. But one important thing to verify first is if your computer has the necessary hardware to support Windows 10.
System Requirements
Although most computers nowadays probably have the necessary requirements for Windows 10. It will certainly be useful to know them in case you want to upgrade from an older system.
The main requirements are −
- A processor (CPU) with a clock rate of at least 1GHz.
- At least 1 to 2GB of memory (RAM), but Microsoft recommends 4GB.
- At least 16GB space in your hard disk.
One important thing to note is that the installation process itself will verify your computer hardware and let you know if it qualifies for a Windows 10 upgrade or not. If not, then you will need to upgrade your hardware.
Upgrade
If your computer qualifies for a Windows 10 upgrade, then you can follow these steps to perform the upgrade −
Step 1 − Look for the Windows 10 notification in the lower-right corner of the screen. This is a one-year-only offer that Microsoft is extending to valid users of Windows 7 and Windows 8.1.
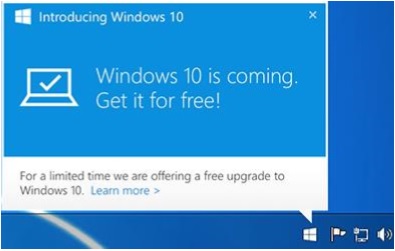
Step 2 − By clicking on the notification, it will start the download and installation process of Windows 10 in your system.
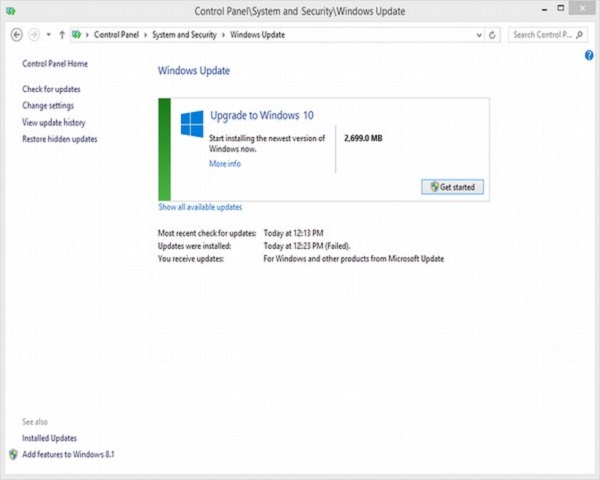
The download required for the upgrade is quite large, so make sure you have a stable Internet connection and continuous power for your computer to avoid interruptions during the process.
Step 3 − After the download is complete, it will prompt you to accept Microsoft’s license terms.
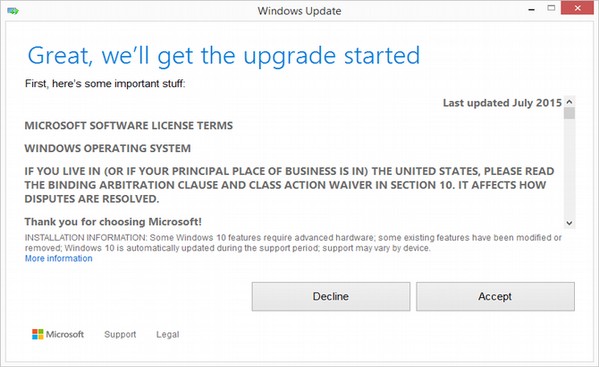
Step 4 − After agreeing to the terms, it will ask if you want to install the upgrade at that moment or schedule it for later.
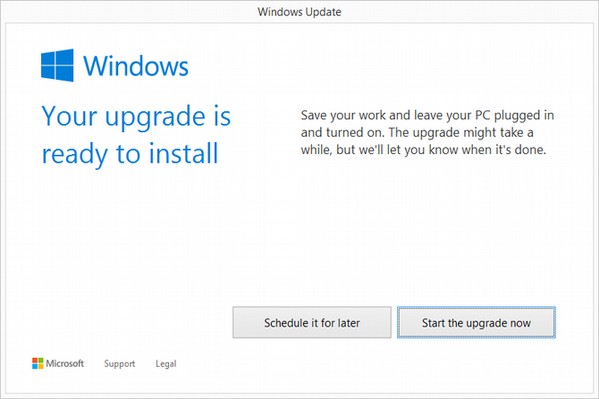
Since the upgrade process can take approximately 2 hours, it will be helpful to schedule it for a time, that will be more suitable to you.
Step 5 − Once the upgrade starts, the system will perform a series of tasks, during which you will see the following screen.
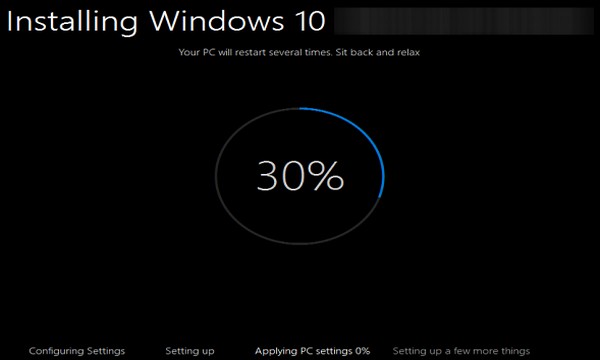
During this time, your computer will reboot a couple of times, so don’t worry. The process itself will take you through the steps to complete the upgrade.
Step 6 − As the upgrade approaches its end, it will ask you to configure some basic Windows settings. You can choose to use Express settings, which will apply the most common or recommended settings, or you can choose to customize the settings as you please.
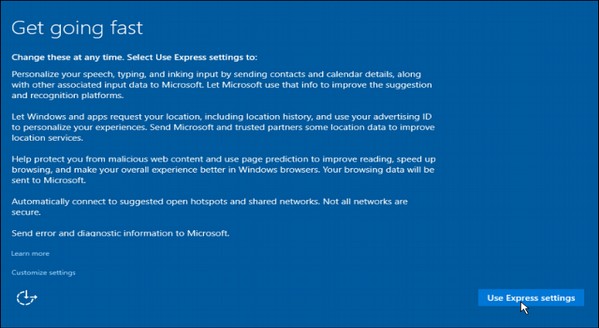
Step 7 − After the upgrade finishes, you’ll see the Windows welcome screen.
Clean Install
If your computer has an older operating system like Windows XP or Vista, you won’t be able to upgrade for free. In these cases, you’ll need to buy a boxed copy of Windows 10 to have a valid license for the installation. Windows 10 will have a starting price of $119.
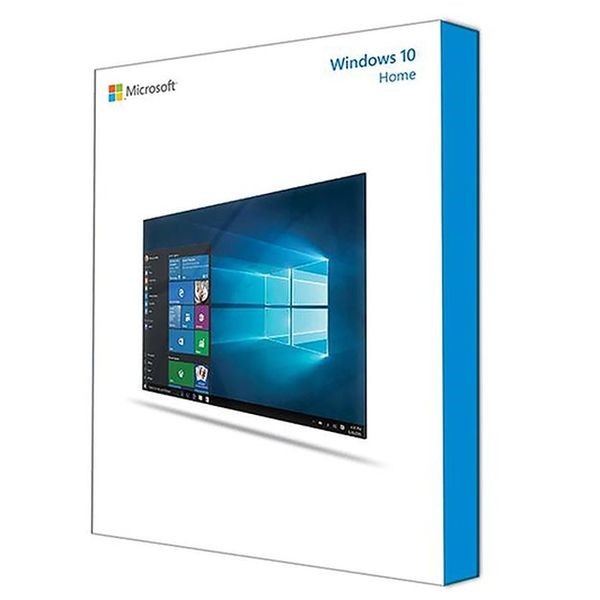
But take in consideration that old computers that have either XP or Vista installed might have obsolete hardware components and might not be suitable for Windows 10. In this case, make sure you review the system requirements listed at the beginning of this chapter to check if your computer is qualified for a Windows 10 upgrade.
If you choose this type of an installation, just insert the disc in your computer and turn it on. Most computers will ask you to press a specific key to boot from the CD/DVD, but most systems use the F12 key. After accessing the disc, you just have to follow the steps which are very similar to the ones from the upgrade.
Windows 10 - Getting Started
After you have installed or upgraded your Windows, you will get a Welcome Screen with the time and date. Just click anywhere to go to the User Accounts Screen.
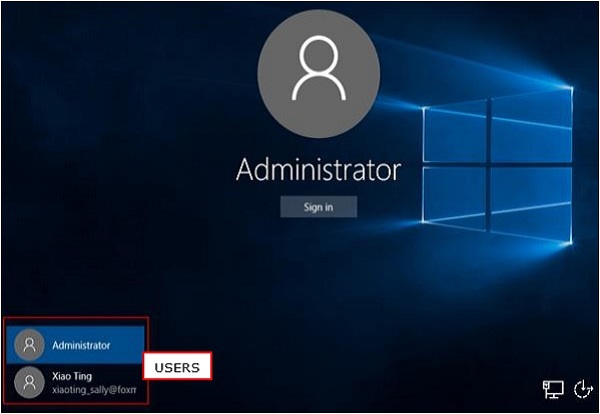
This screen lets you choose which user you want to log in to from the lower-left corner. After choosing the right user, and entering a password if necessary, you will see the Windows Desktop.
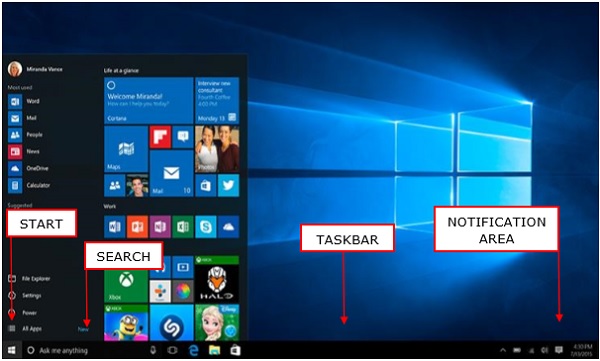
The Windows Desktop is simply your operating system main screen. Here you have access to an array of tools like the Start Menu, Taskbar, and other icons. Windows 10 also introduces a search box in the Taskbar, which facilitates browsing both your computer and the Web.
Windows 10 - GUI Basics
Once you get to the Windows Desktop screen, here are some basic features you will see.
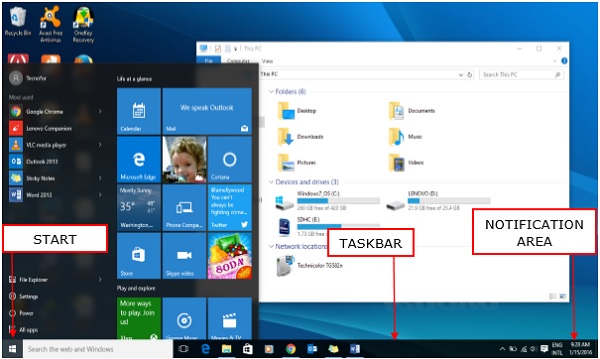
One of the most important parts of your Desktop is the Taskbar. By default, it sits at the bottom of your screen giving you access to the Start Menu, several application icons, and the Notification Area.
Windows
In Windows 10, if an application is active or opened, you will see a green line below its icon. Clicking the icon will bring the application window up.

Every open window features three buttons in the upper-right corner. These are used to minimize, maximize, or close the window −
- Minimizing means that the window will hide in the Taskbar.
- Maximizing will bring the window to a full-screen size.
Windows can be moved around or resized as you please −
- To move a window, just click on its Title Bar on the upper side of the window and drag it.
- To resize a window, move your mouse to any corner until you see a double-sided arrow. Then click and drag until you reach the desired size.
Icons
Most Windows versions will feature different icons on the background. An icon is simply a graphic representation of an application or a file. To open or access an icon, just double click on it.
Although the amount and type of icons will vary, depending on the computer, you can add more icons by following these steps −
Step 1 − Right-click on the Desktop Background.
Step 2 − Choose “New” and “Shortcut”.
Step 3 − Browse for the application or file you want to create a shortcut to.
Step 4 − Assign a name to the shortcut and click “Finish”.
Icons can also be moved around by clicking on them and dragging them to another place in the screen.
Desktop Background
Another component of your Desktop is the Background. This is simply an image that appears at the back of your screen. Most computers come with a pre-selected background, but you can change it to any image you want.
To change the background, follow these steps −
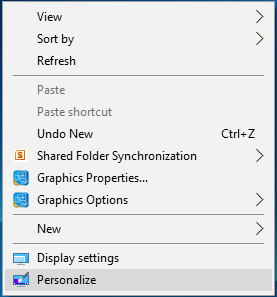
Step 1 − Right-click on the background and choose “Personalize”.
Step 2 − From the Personalization window, choose from a series of pre-selected pictures or browse for your own.
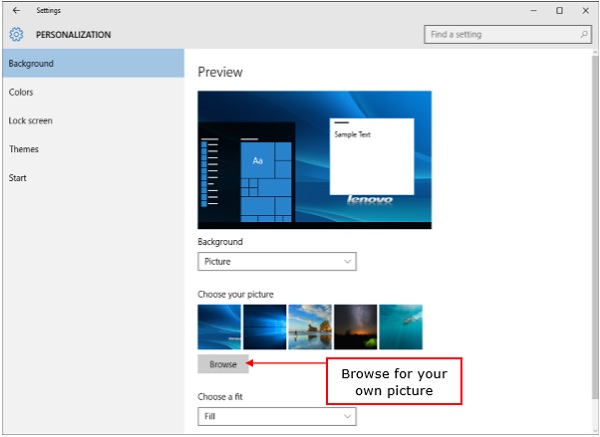
After choosing a picture, the Background will change automatically.
Windows 10 - Navigation
To navigate your Windows, you can simply type what you are looking for on the Taskbar search. It can be the name of a document or application, or just any information you are looking for.
Start Menu
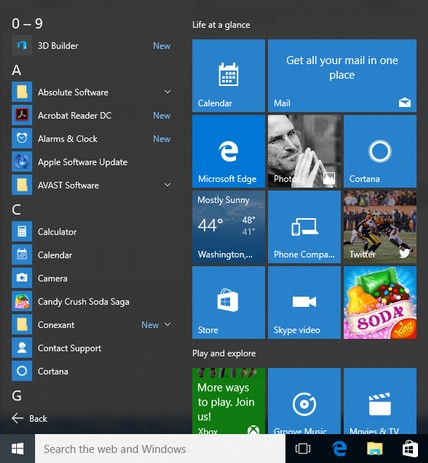
If you are looking for a specific application, you can also open the Start Menu and click “All Applications”. This will open an alphabetical list of all the applications installed on your computer.
File Explorer
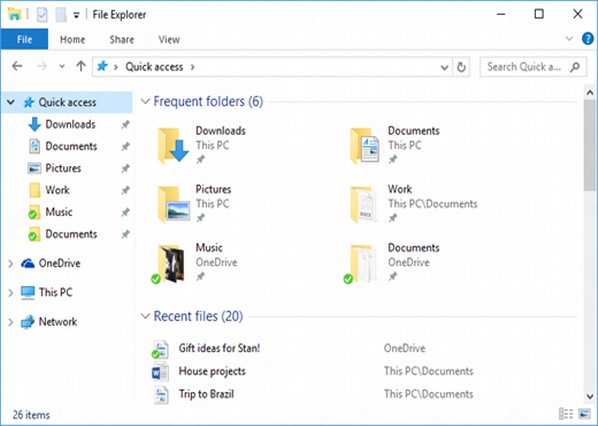
If you are looking for a specific document, another alternative is to use the File Explorer by clicking on the Folder icon on the Taskbar.

In the File Explorer window, you can browse all your folders and documents.
Virtual Desktops
One of the new features of Windows 10 is the addition of Virtual Desktops. This allows you to have multiple desktop screens where you can keep open windows organized.
To add a virtual desktop, follow these steps −
Step 1 − Click Task View on the Taskbar.
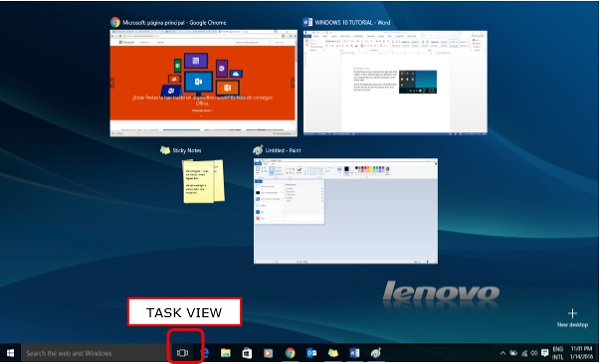
Step 2 − Click the “New desktop” option on the lower-right corner. You can access or delete the new Desktop by clicking Task View again.

Windows 10 - Start Menu
The Start Menu is the main point of access to your applications. There are two main ways to open it −
Step 1 − Use your mouse to click Windows icon in the lower-left corner of the taskbar.
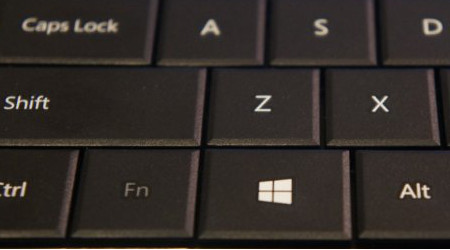
Step 2 − Press the Windows key on your keyboard.
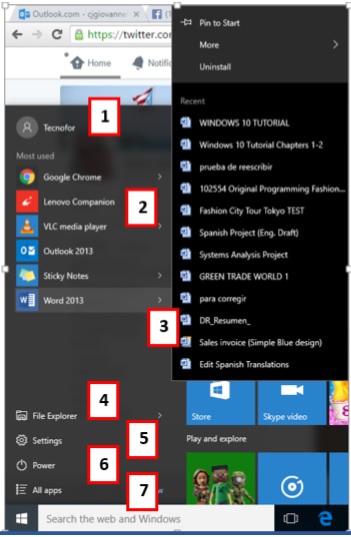
The Windows 10 Start Menu features two panes.

The left pane resembles the traditional Start Menu from Windows 7 and earlier, while the right pane features live tiles that were used in Windows 8.
Left Pane
Among the things you can do in the left pane are −
- Click the username at the top of the menu to change account settings or log in with another user.
- Access the applications you use more frequently.
- A small arrow next to an application will open a sub-menu with a list of recent documents opened with that application.
- Open the “File Explorer” to navigate your folders and files.
- Change the settings of your computer like your Internet connection or changing your background.
- See different options to shut down your computer.
- See a list of all the applications installed in your computer.
Search Box
The “Search box” on the Taskbar will allow you to search within your documents and files or on the Web for anything you write. The initial results will appear within the Start Menu itself.
The results will be grouped according to the closest match (or matches) labeled “Best match” at the top of the list.
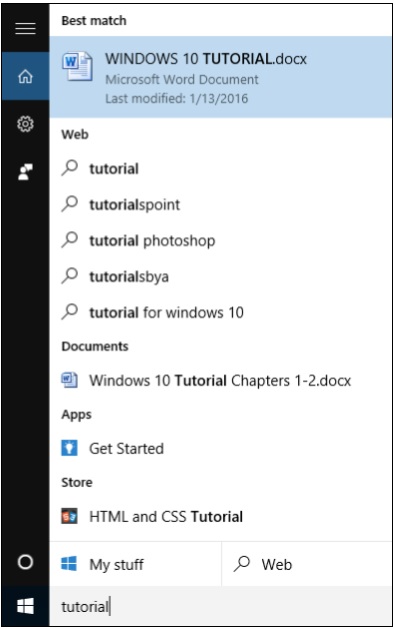
The remaining results will be grouped according to what they are or their location −
- Web results
- Documents or folders
- Apps
- System settings
The icons on the left side of the menu do the following −
 The Gear icon will allow you to configure the settings of your Search.
 This icon will let you send Feedback to Microsoft on what you like or dislike about Windows.
 The Cortana icon will activate Windows’ new personal assistant.
Clicking “My stuff” or “Web” at the bottom will expand the Start Menu and limit your results to the location you choose, as well as streamlining the search.

Right Pane
The right pane features a varied array of tiles, similar to the ones that were seen on the Start Screen of Windows 8.
These tiles can be moved and dragged to different places by holding the mouse button.
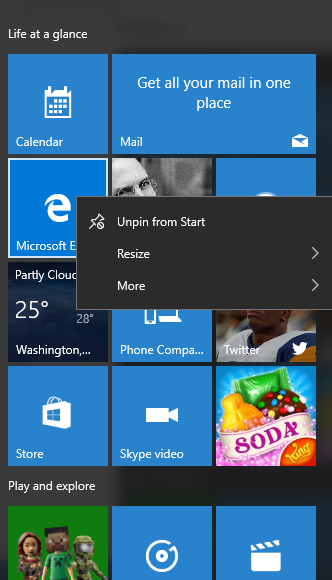
You can also configure them by right-clicking on them to see options to resize them or “unpin” them (remove them) from the Menu.
The whole Start Menu can also be resized by dragging the borders with the mouse to the desired size.
Windows 10 - Taskbar
The Windows 10 taskbar sits at the bottom of the screen giving the user access to the Start Menu, as well as the icons of frequently used applications. On the right-side, the Taskbar features the Notification Area which informs the user of different things like the state of the Internet connection or the charge of the laptop battery.

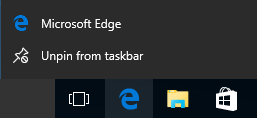
The icons in the middle of the Taskbar are “pinned” applications, which is a way to have a quick access to applications you use frequently. “Pinned” applications will stay in the Taskbar until you “unpin” them.
Pin an Application to the Taskbar
Step 1 − Search for the application you want to pin in the Start Menu.
Step 2 − Right-click on the application.
Step 3 − Select “More” option at the top of the menu.
Step 4 − Select the “Pin to taskbar” option.
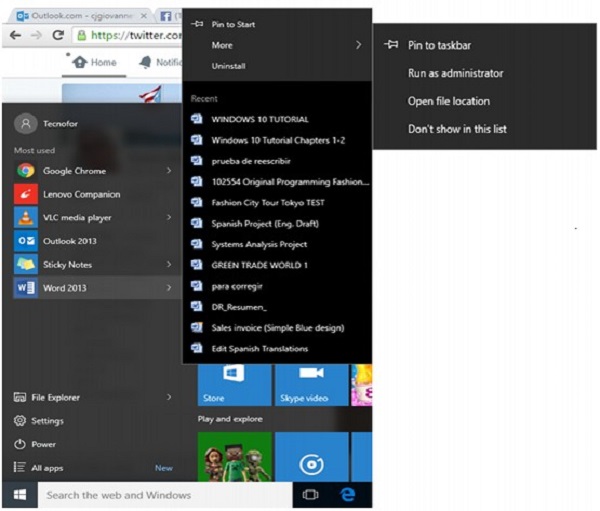
This will attach or “pin” the application icon to your Windows Taskbar.
Unpin an Application from the Taskbar
To “unpin” it, just right-click the icon in the Taskbar and select “Unpin from taskbar”. You can “pin” it back again any time you want.
Notification Area
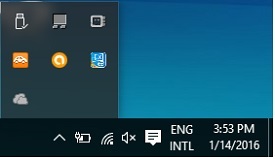
The Notification Area is located at the right side of the Taskbar. It shows different types of notifications from your computer like your Internet connection, or the volume level.
At first, the Notification Area shows a limited amount of icons. But you can click the upward arrow on its left-side to see other icons as well.
Task View
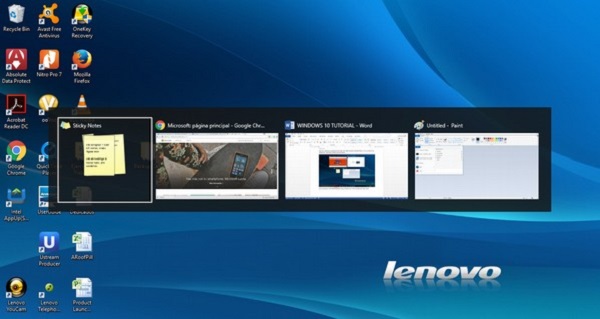
Task View allows you to quickly move within your open windows and applications. You can access it by clicking the “Task View” button from the Taskbar.

You can also press and hold the Windows key, and then press Tab to achieve the same result.
By pressing the Alt+Tab keyboard shortcut also serves a similar purpose.
Windows 10 - Tablet Mode
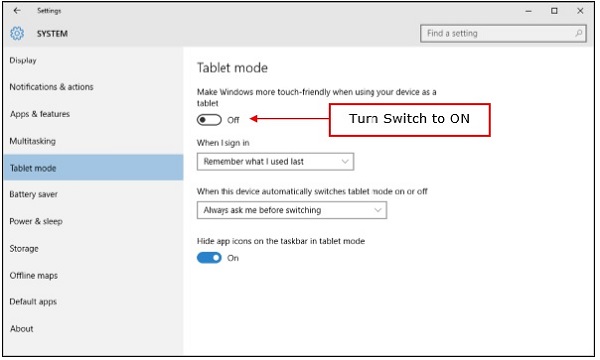
The Tablet Mode is a new feature in Windows 10, which allows the user to switch the system interface, whenever a tablet is detached from a base or dock. When the Tablet Mode activates, the Start Menu goes full-screen. During Tablet Mode, many other windows like the File Explorer or the Settings window also open at full screen.
How to Activate the Tablet Mode?
Step 1 − Open the Start Menu and select “Settings”.
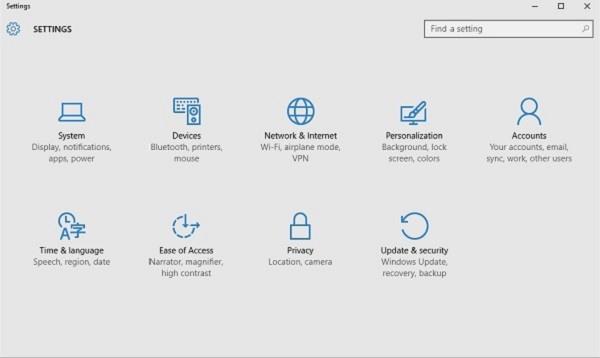
Step 2 − Select the “System” option.
Step 3 − Turn the Tablet Mode switch from “Off” to “On”.
Comments